A few thoughts about the previous mix
In my previous post I’ve shared a tiny DJ mix I made. Let me write a few extra words about how it was done, which can be mostly interesting if you ever wondered about making your own mixes or even made a couple of them.
Every single time when I start discovering a new music direction / genre, the biggest problem I usually run into is hitting the levels of consistency where I could make a proper compilation from the pieces I find. Reaching the point where you can start mixing can be hard, because unless you play mostly standard electronic music stuff, you might run into an unmanageably large BPM range to cover. This time, when I started to play with the idea of doing something with those Japan-related tracks, I selected around 90 tracks in 3 major moods. The bad thing is, in each of the three, I managed to hit practically the entire BPM range (80-150), which is exactly not what you want for getting started. 😀 I felt a bit demotivated by this, but later with a more strict filtering I got to the tracks which are in the mix (you can say that those are the simple cases). I estimate that I would need around 4-5x this many tracks (so, around 400-500 in total) to be able to select things more properly.
Once I tested a few pairs, the mix itself formed quite quickly, but there were a few issues:
- finding tracks matching in key was quite hard;
- because most of the tracks I selected don’t have an extended edit (with longer intro / outro) to begin with, I had to apply short(er) transitions.
This is why I had to do some quite drastic cuts in the beginning, which normalizes around the end of the mix; there, I could play longer transitions, even though a few of them are mildly dissonant (hopefully in a still entertaining way).
The mix itself was made in Ableton Live. About EQing, I would add a few words, given that it wasn’t made with the usual 3 EQ technique, but with a somewhat more experimental one:
- I put together a “transition filter”, a one-knob device which is cutting both low and high at the same time, adjusting the filter frequencies.

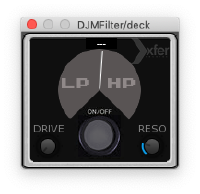
- I’ve also used the DJMFilter, which is a somewhat similar one-knob device, but it’s midpoint-neutral: if you twist it up, it cuts the low, on twisting down, it cuts the high. It’s a free download that you can get here for example. This tool was mentioned in EPROM’ “How I Play” video, which is definitely worth to check out, there are quite a few nice tricks there.
For the mixing itself, I only needed to automate the two one-knob devices and the volume levels, like this:
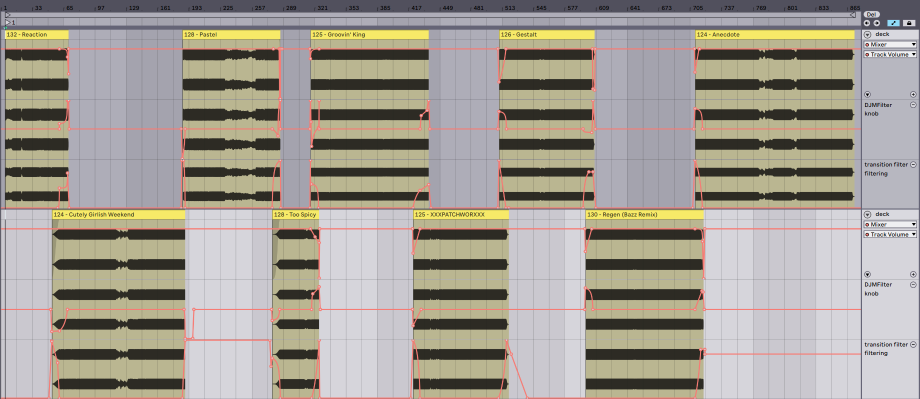
(OK, there are a few points where the clips’ fade was also used, but I rarely used them, and those could be completely replaced with volume automation anyway.)